Traveling w/ Dogs: Argentina to USA
So, you need to travel from Buenos Aires with your dog? Worried it’s going to be hard? Don’t know where to start? I feel you. I’ve been in the same spot. It was hard to figure out what steps I needed to take to get my dogs on an international flight with me so I wrote this step-by-step guide to help others behind me.
**The requirements I list in this post are specific for a person travelling to the USA from Argentina on Aerolineas Argentinas. Of course the specific requirements could change based on the country you are traveling to or the airlines you are flying. But this will still serve as a good base guide for you.
As an Amazon Associate, I earn from qualifying purchases. This post contains affiliate links at no extra charge to you. I only feature products that I believe in and use myself.
First things first! Before we get into the actual steps you’ll need to take, there are a few administrative items that need to be taken care of.
Airlines Confirmation
Be sure to call your airline and confirm pets are allowed to fly. And also how they can fly - in the cabin with you or below in the cargo hold. These details are especially important if you have an older dog or a dog that stresses easily. They may travel best with you in the cabin.
On Aerolíneas Argentinas, pets were allowed to fly both in the cabin (economy class only) and under the plane as cargo. We chose to take our small dogs on the plane with us.
Once you have confirmed with the airline that it accepts pets, you need to make a reservation for them. To do this, simply call the airline and reserve a spot for your pet.
This is very important because normally airlines only allow a certain number of pets on each flight - first come first served. You don’t want to show up for your flight and there are no more pet reservations available!
Travelling Supplies
Second, you’ll want to make sure you have the proper travelling supplies for your dogs needs. This includes a carrier that meets the measurements the airplane requires and a way for your pet to drink water while you’re on the plane. Also, you’ll want to have pup pads, bags, cleaning supplies and wipes to clean up any messes your pet makes in the carrier or in the airport.
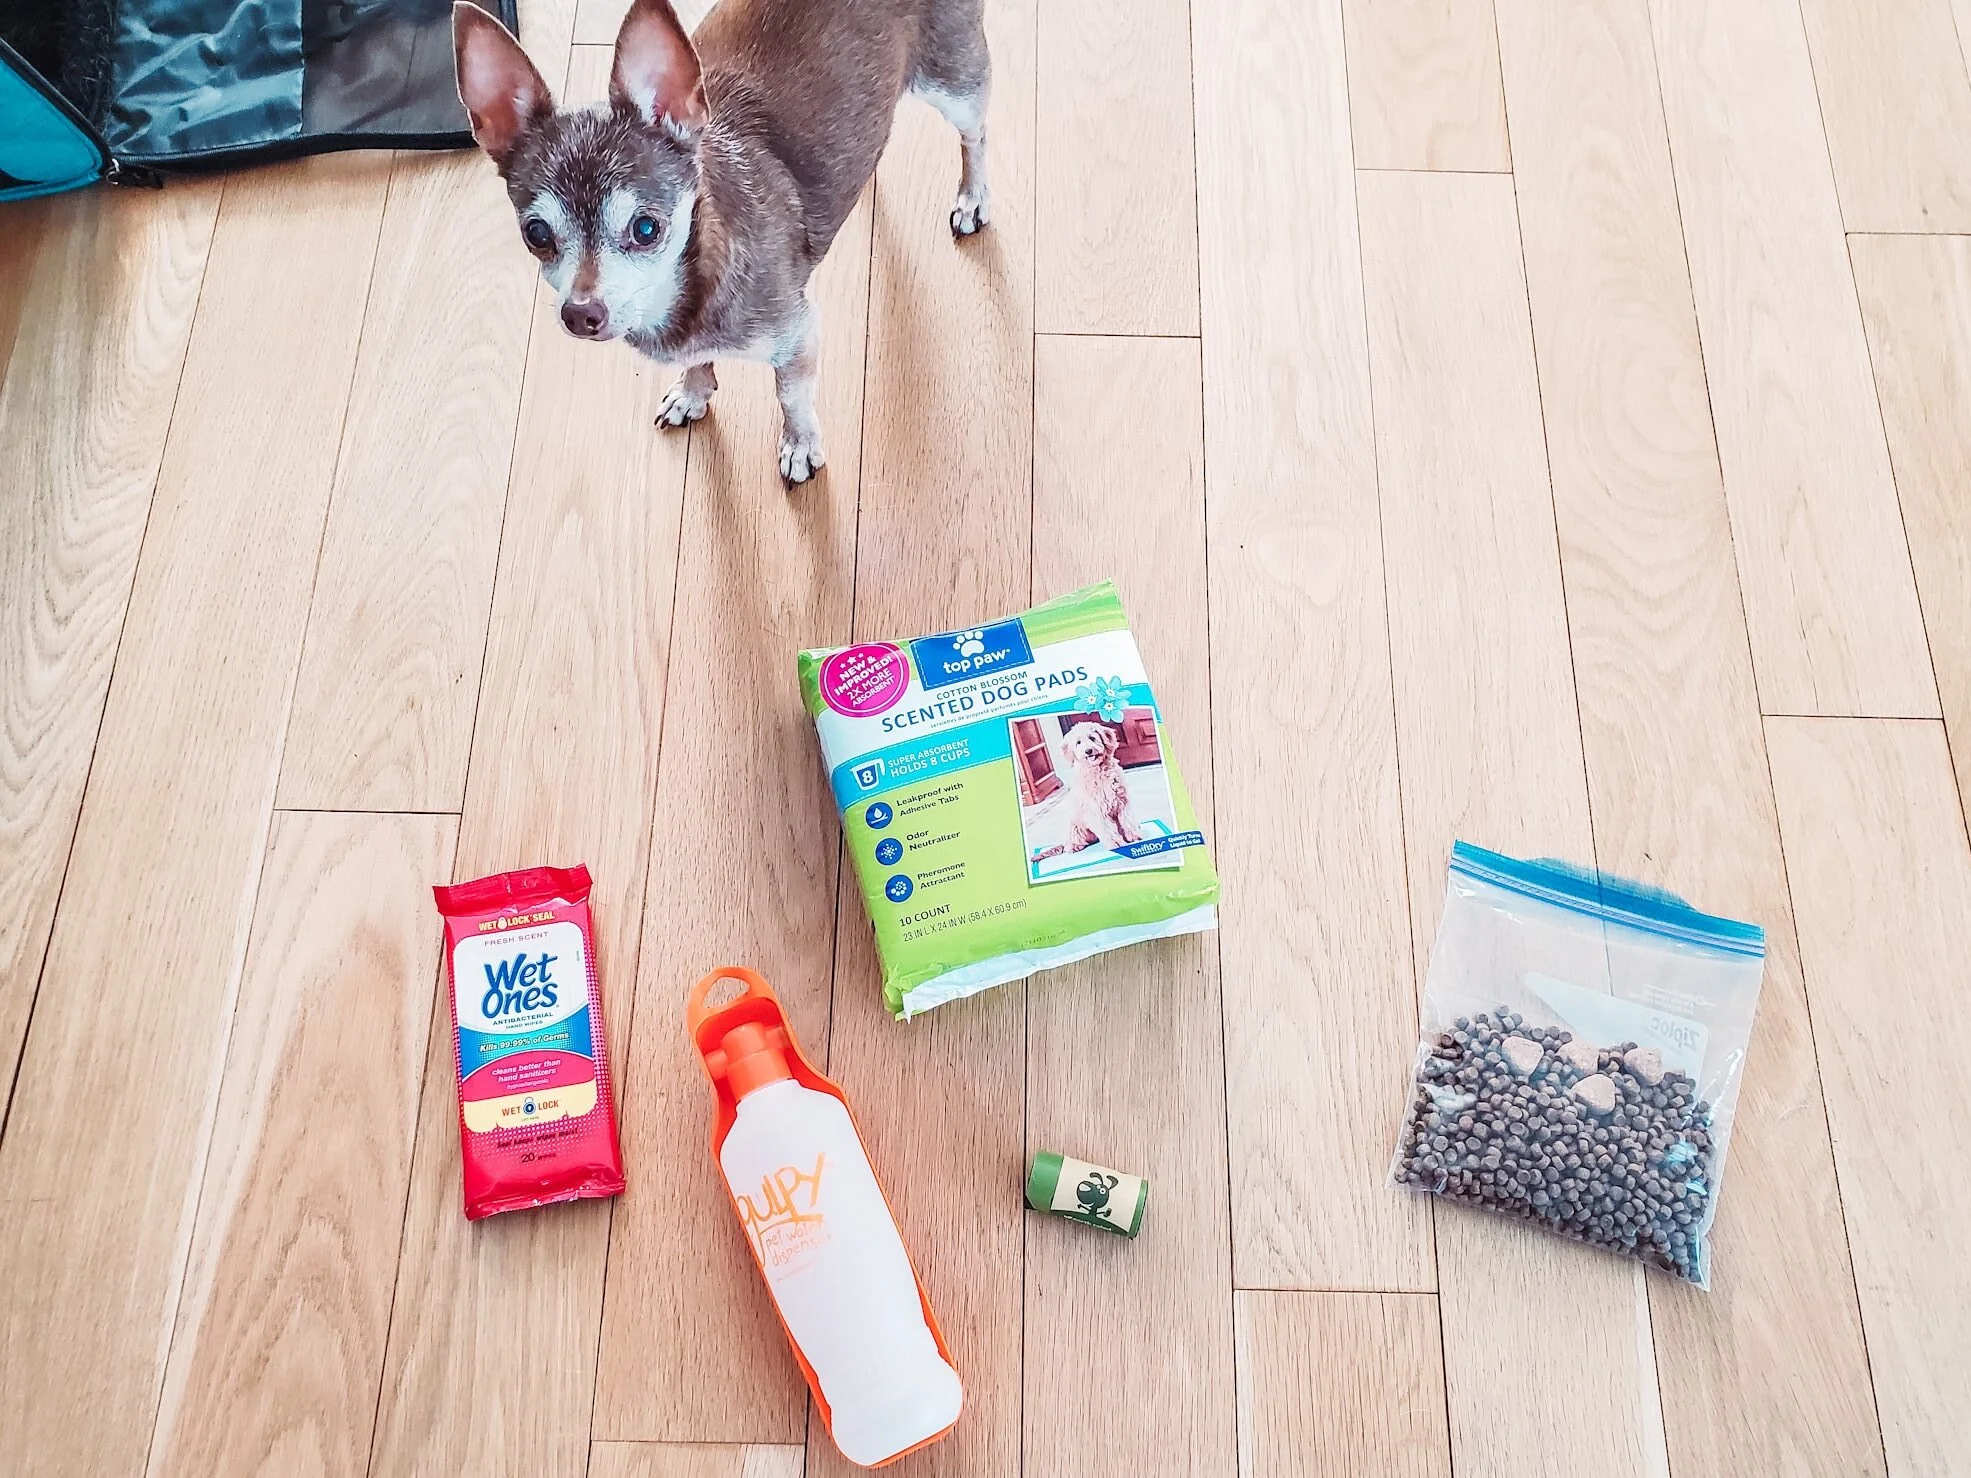
Below, I’ve linked the pet supplies I use on all our trips. My pups have been on 6 international trips now and these are my go-to items for pet travel!
WetOnes wipes because you never know when an accident may happen.
Puppy pads to line your pets crate in case of an accident while flying.
These hard sided dog crates are perfect for long trips under the plane (in cargo).
These soft sided dog crates are perfect for trips inside the airplane with you. They also fold out so your pup has extra room once you’re on the plane.
I always carry these doggie bags with me to pick up any messes left by my dogs!
This water bottle is a great way to make sure my dogs are always hydrated. You can empty it and take it in the airport with you too!
Alright, we have the administrative stuff out of the way...let’s get into the actual steps to taking your dog overseas.
Step #1 - Veterinarian Visit - 4 Days Before Your Flight
You’ll need to locate a veterinarian that is able to complete the international health certificate for you. Not all veterinarians are able to do this so be sure to call and confirm first.

Once they confirm they can assist you, make an appointment to take your dog for their visit 4 days before your flight. We booked our 5 days before and we had some trouble at the Senasa office. The miases declaration is only valid for 5 days before the flights. Apparently they count the day you go to the vets office as Day 1.
When you go to the vet office 4 days before your flight you’ll need to obtain the required travel documentation from them - international health certificate, miasis free declaration, rabies certificate. A copy of your passport is also required.
In addition to the documentation, the veterinarian will check the dog to ensure they are fit enough to travel.
Step #2 - Take those docs to SENASA in Puerto Madero
This step may take up to 2 hours but you might get in and out quickly. There is a way to reserve a time slot online but it wasn’t working for us so we walked over without an appointment and crossed our fingers! Our visit only took an hour.
When you walk in, there’s 1 or 2 people working and they will ask you why you are there. Just tell them you need a travel certificate for your pet. They will give you a request form to fill out for each pet. Be sure to take a pen with you! Once you fill out the form with basic information about your dog and yourself, let them know you are finished and they will call you up when it’s your turn.
You will hand all your paperwork over and then you will take a seat again while they prepare your documents. When they have prepared everything they will give you an invoice to take to the cashier window to pay.
Once you’ve paid the fee, you will receive the documents you need - paperwork and a certificate for each pet. Make sure you double check everything. I have caught mistakes before! Then you’re good to go! Keep those docs in a special place because you’ll need them when you go to the airport.
Step #3 - Prepare Your Dog for Air Travel - 2 Days Before Flight
Imagine if you were doing something completely new for the first time and nobody explained it to you beforehand.
Well, that’s probably how your dog feels when he travels for the first time. And since we can’t explain to our pets what’s going on, it’s important to prepare them for travel.
The biggest change for your dog may be being in their crate for 10+ hours at once. To help prepare them, I recommend pulling their crate out and leaving it out in the living room the last few days before your trip. I put my dogs in it for 1-2 hours at a time for them to get used to it. But I stay close by so they know they are still safe when they’re in the crate.
The other thing I have to remind them about is how to drink water from a special travel water bottle. They normally use a water bowl everyday so if I pulled out a bottle during a flight they would be completely confused. It’s a good idea a couple days before the flight to replace their water bowl (or put it next to the water bowl) with the water bottle so they get used to drinking from it.

If you introduce your dog to these things, your trip will be much less stressful for your dog.
Step #4 - Airport Navigation - 3 Hours Before Flight
On the day of your flight, leave extra time because you will have to visit the SANASA office at Ezeiza. (Yes, even if you already went to the Puerto Madero office - this is an additional required step) Go to the international arrivals terminal and head towards Starbucks (between where you check-in and where people come out of the baggage area). There’s a long hallway and you’ll feel like you’re going behind the airport, keep going.
The SEASA office will have a large plexi-glass window where you can ring a bell and someone will come help you. We were worried nobody would come because we were there at 8:30pm on a Saturday, but after about 7 minutes of waiting somebody came around the corner and helped us.
The SENASA agent took our paperwork and filled out yet another certificate. We had to pay a small fee (around $600 pesos) and then we were on our way back to the terminal to check-in.
It’s a simple process but make sure you leave an extra 30 minutes (in case there’s a line) to get it done.
Check-In
The check-in process was pretty simple. The only thing we weren’t aware of before our flight was that it’s required to have 6 rows between animals. So my husband and I sat 6 rows apart. But the plane was super empty so everyone moved as soon as the doors shut and the flight attendants had no problem with us moving closer to each other.
Once you’re on the plane, it’s pretty easy from there. Just checking on your dog every hour or so to make sure they’re hydrated and doing ok.
When you land in the US, be sure to have your international health certificate and rabies certificate available for customs to review.
I know it seems like a daunting process but if you take it one step at a time, it’s not so bad. When I first started to look into everything I would need to get done it was pretty overwhelming but each time I completed a step it felt like a small victory and like I had one more piece of the puzzle completed.
Take this blog step-by-step and I promise you your international travel with your pet will be so much easier.
Safe Travels!